
Today, I had the chance to dive into some hands-on automotive repair training. My task was to disassemble and reassemble a Nissan engine, gaining firsthand experience of what goes into repairing and understanding car engines. This hands-on experience in automotive repair training taught me a lot about the process, the tools needed, and the importance of patience and teamwork.
The Setup: Dividing the Work We split into groups and each team was assigned an engine. Since there weren’t enough engines for everyone, we had to share. My team of four got the Nissan engine, and it was a bit intimidating at first. It was more complex than we expected, and there was a lot to figure out. But we were up for the challenge.
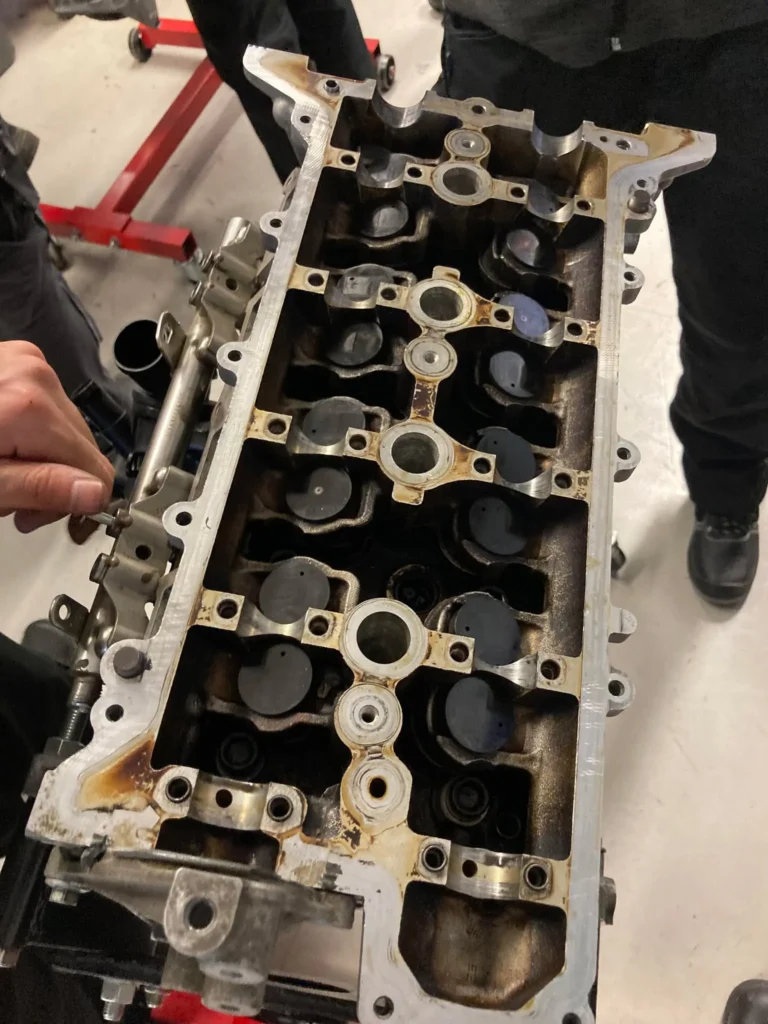
The Disassembly: A Test of Patience Taking the engine apart wasn’t as easy as I thought it would be. The spark plugs were the real challenge. We tried everything — screwdrivers, pliers, even our fingers — but those plugs were stuck. After some frustration, we finally got them out. The rest of the disassembly was smoother, but it really taught me how important it is to take your time and stay organized. Each part has its place, and making sure you keep everything in order is crucial when it comes time to put it all back together.
The Tools We Used A lot of tools helped us get the job done, and I learned just how important it is to use the right ones. Here’s a quick rundown of the key tools:
- Socket Wrench — This was our main tool for loosening and removing screws. We used different socket heads to make sure we had the right fit for each fastener.
- Ratchet Wrench — This tool helped speed things up. It let us turn bolts quickly without having to reposition all the time.
- Torque Wrench — When it was time to reassemble, we used this tool to tighten bolts to the right specs. It’s important to get the torque just right to avoid damaging parts.
- Crankshaft Turning Tool — This small tool let us rotate the engine to align the timing marks. It made a big difference in getting everything set up properly during reassembly.
Reassembling the Engine: Getting Everything Back Together When it came time to put everything back, I was surprised at how much smoother it went. The key was staying organized and paying attention to detail. We checked and double-checked everything to make sure it was going back in the right place. The best part was when we finally spun the crankshaft and saw the engine turning smoothly. That was a relief!
Conclusion: Working Through the Stress Looking back on the day, I realize it wasn’t just the technical stuff I learned — it was how to work under pressure. Everyone was rushing to finish, but I quickly realized that taking my time was the best way to get the job done right. Patience, organization, and clear communication were key.
By the end of the day, we had successfully reassembled the engine. It wasn’t perfect, but we did it. And honestly, the sense of accomplishment we felt after pushing through the challenges made it all worth it.
Thanks for reading! If you’re interested in more content like this, or want to learn about my journey in the world of automotive repair, make sure to visit my About me page.


Pingback: Top Car Maintenance Tips - thegaragejourney.com